


How to Properly Install an EXE File on Windows
This guide shows how to install EXE files on Windows and avoid common pitfalls like hidden offers and missing components during setup

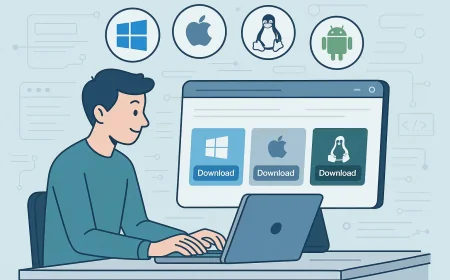
EXE files are one of the most common ways to install programs on Windows, often used alongside another popular format called MSI. Installing software from an EXE file on Windows is a common task and therefore might seem straightforward, but doing it properly helps you avoid unwanted system changes, annoying software, or unnecessary browser plug-ins.
Types of EXE Installers
EXE installers can vary depending on how the software is distributed and what the installer is designed to do. They may differ in behavior, purpose, and complexity. Many installers also combine features from different types, making them more flexible or specialized. Below are the most common kinds you might come across on Windows.
- Offline installer: A complete setup package that includes all necessary files. No internet connection is needed during installation.
- Online installer: A small launcher that downloads components during installation. Requires an active internet connection.
- Self-extracting archive (SFX): An archive file (like ZIP or RAR) converted into an EXE. When launched, it unpacks its contents into a selected folder.
- Silent installer: Installs the program automatically with default settings, without showing any prompts. Commonly used in corporate environments or batch installations.
- Portable EXE: Not actually an installer but a ready-to-run application that doesn't require installation. Just open it and use the software. It makes no changes to the system.
Administrator Permissions
When you run an installer, Windows usually asks whether to allow the app to make changes. This security prompt is normal. Click Yes if the installer comes from a trusted source. If you never see the prompt, it may mean that User Account Control (UAC) is disabled on your PC.
In some cases, you might not be able to install anything at all without administrator rights. Certain programs can be installed only for the current user, while others require full administrator access. A device administrator can also choose to install software for all users on the system.
How to Install an EXE File
This guide outlines the typical steps for installing applications on Windows. Not all installers follow the same structure. Depending on the specific application, some steps may be skipped, appear in a different order, or look entirely different.
It’s crucial to approach each installation carefully. Don’t rush through by simply clicking “Next.” Take time to read every window, pay attention to the details, and only proceed when you’re sure of what’s being offered or requested.
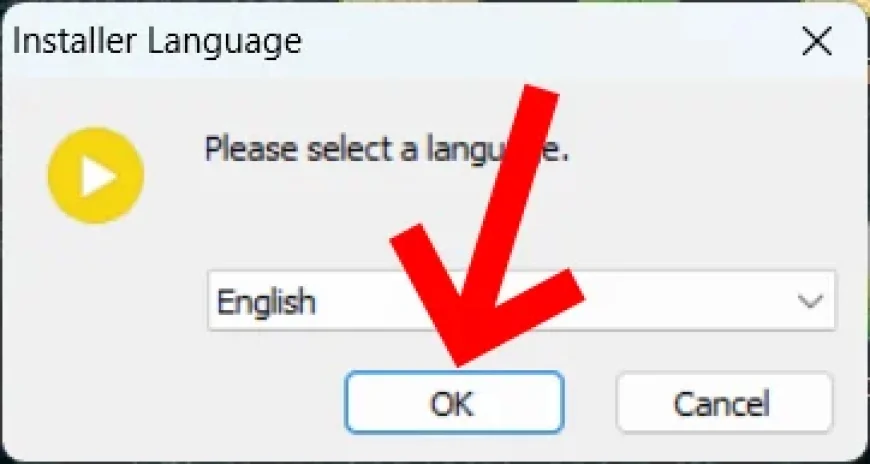
Double-click the file to launch the installer. Confirm the security prompt if it appears.

If the option is available, choose the language for the installation process.
If it’s an online installer, wait until the download is complete.

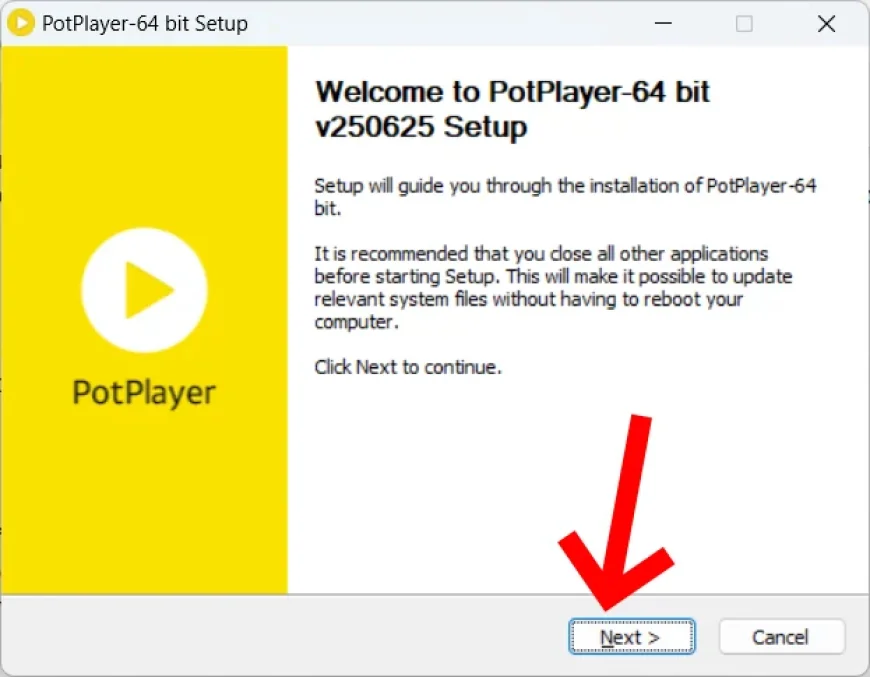
After that, the installer window will open.
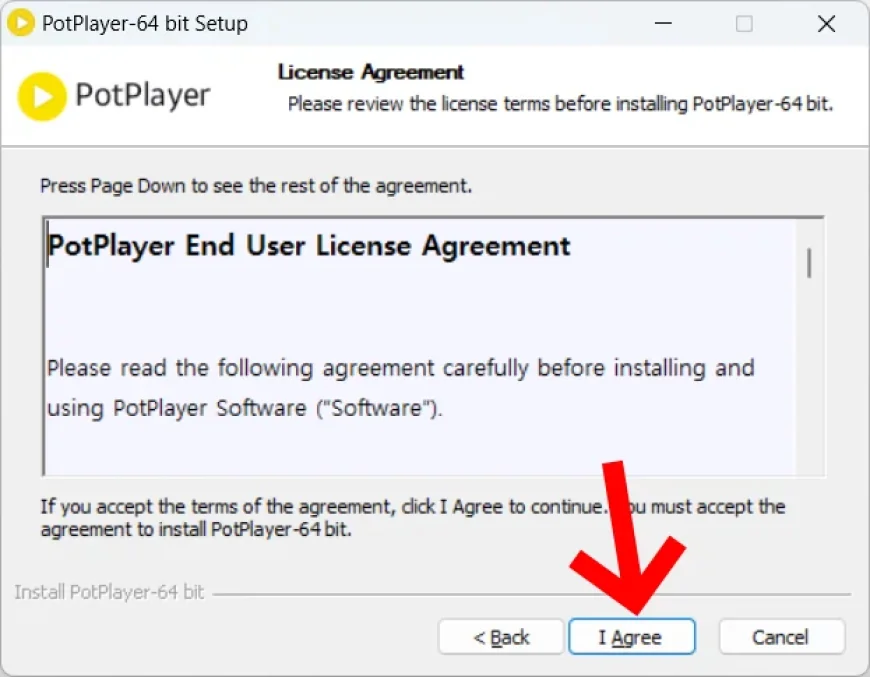
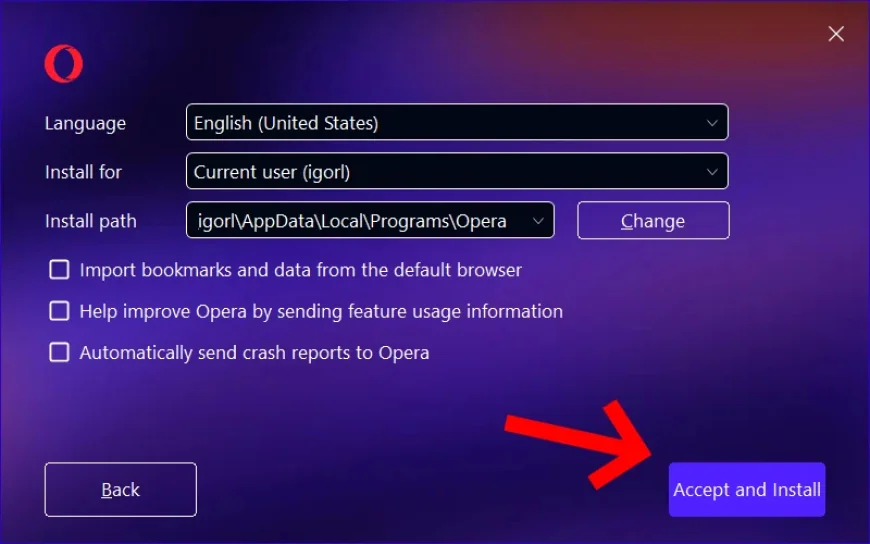
Skim the license agreement or terms of use. Even if they are long, they often contain important details about data collection, bundled software, or usage restrictions.
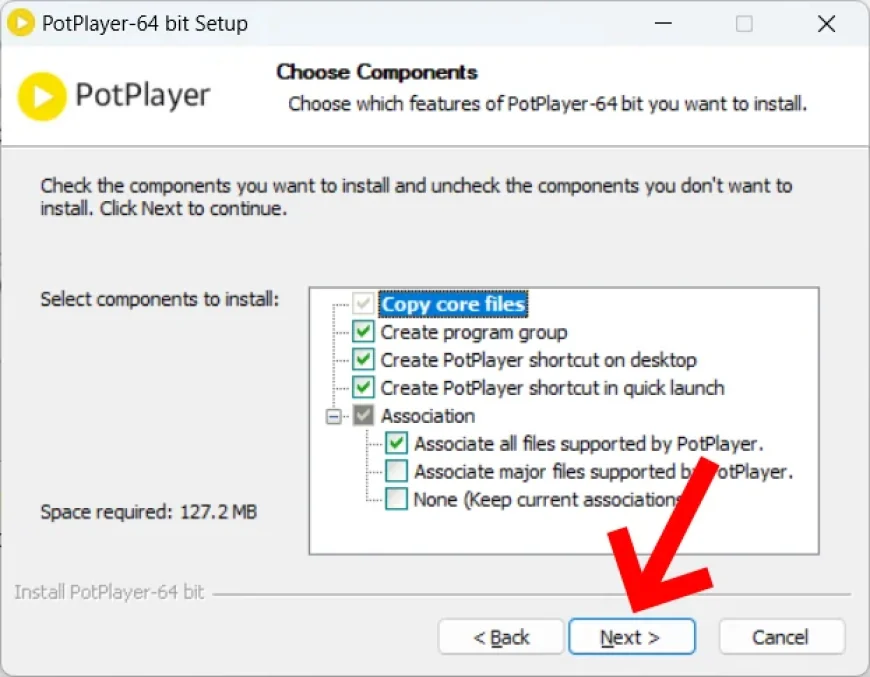
A setup options window may appear where you can choose which components or modules you want to install.
Some installers offer the option to send anonymous usage data or error reports to help improve the software. While this might sound useful, it often means allowing the program to run background processes or share information about your system. Think twice before enabling this — ask yourself if it’s really necessary.
You may also encounter a window with additional system integration options, such as creating shortcuts or associating certain file types with the program. Review these settings carefully, as they can affect how the application behaves on your system.
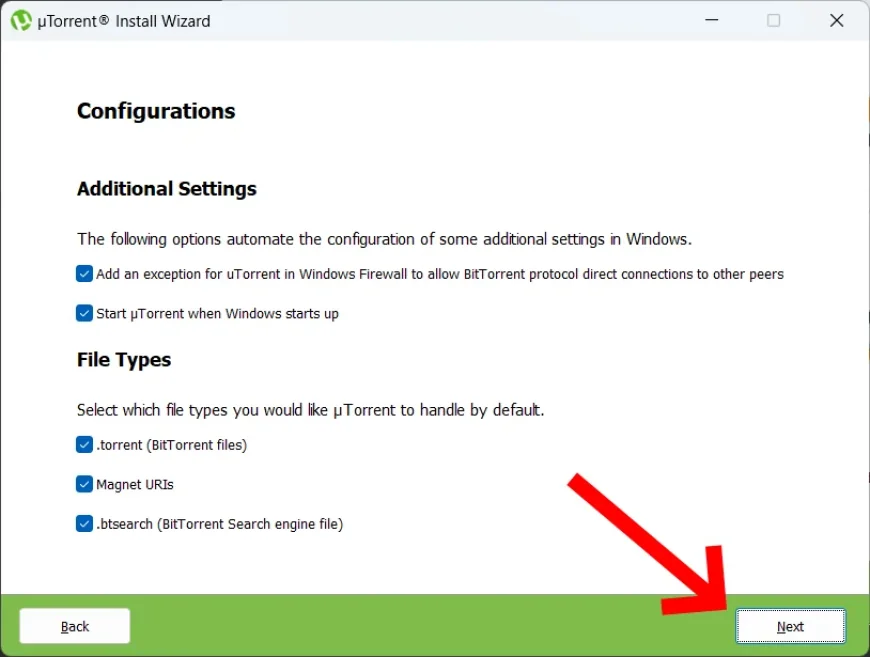
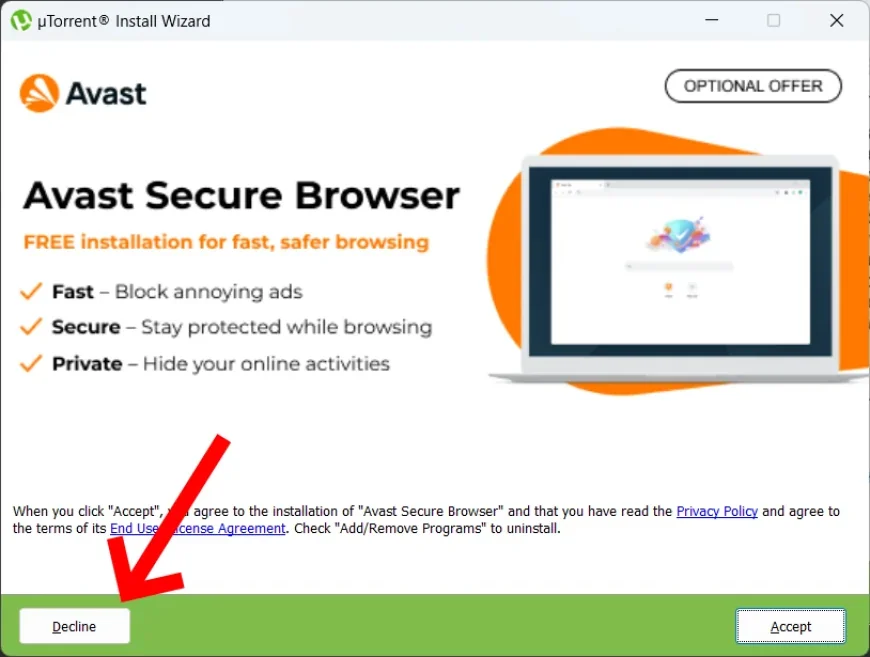
Many installers offer optional extras such as setting a different search engine or adding browser plug-ins. These offers can appear in various forms, so pay close attention and carefully read each step before proceeding.
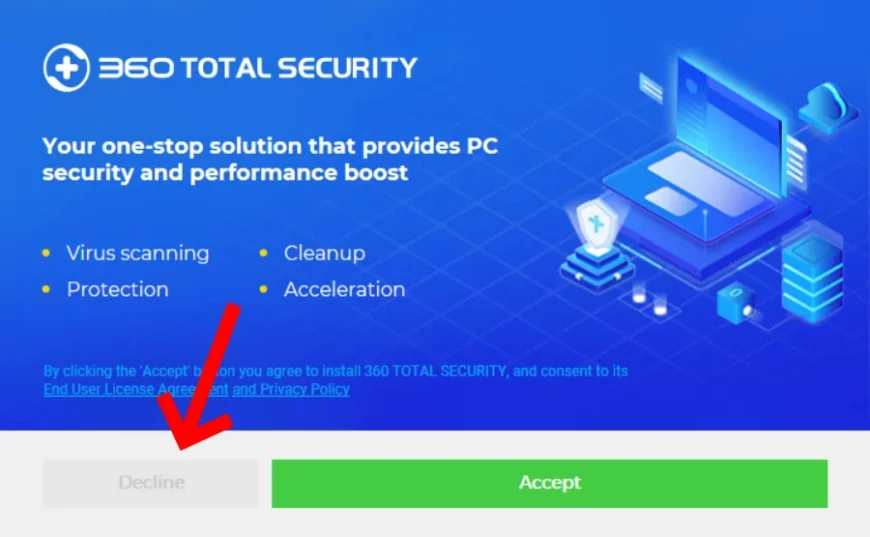
Developers can be surprisingly inventive, and even seemingly harmless checkboxes may hide settings that are inconvenient — or in some cases, even risky.
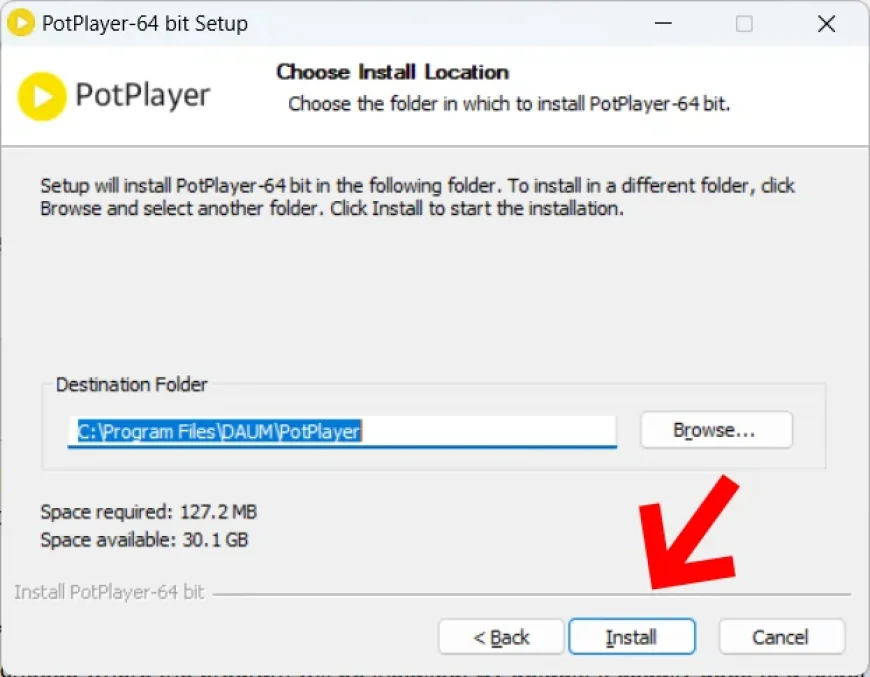
Some installers allow you to choose where the program will be installed. By default, it usually goes to a folder like: C:\Program Files\YourApp or C:\Program Files (x86)\YourApp. You can leave the default location or change it if you prefer more control, such as installing the program to another drive or into a custom folder.
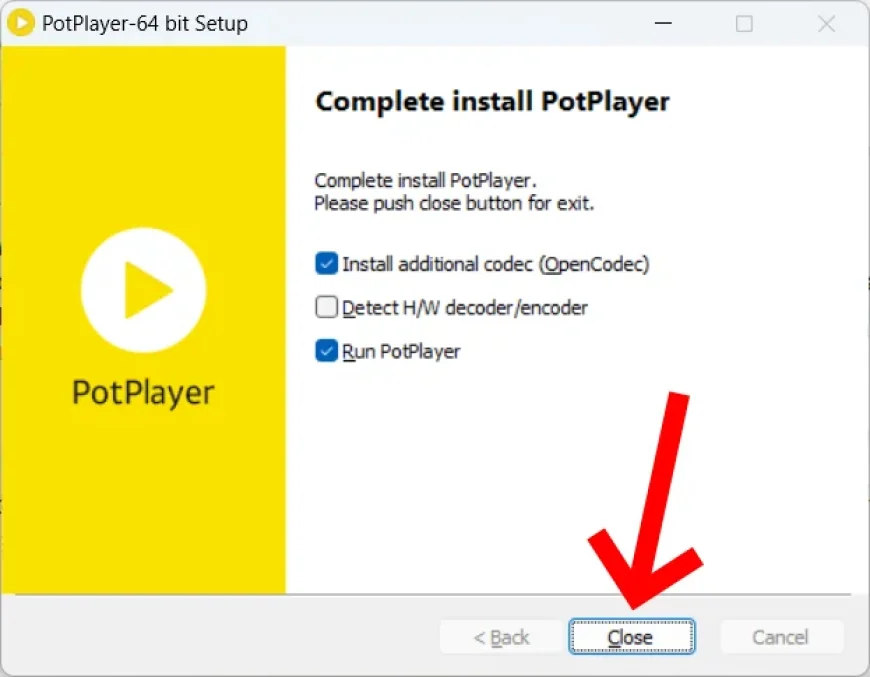
Some programs need additional system components like the .NET Framework or Visual C++ Redistributables. In many cases, the installer will download and install them automatically. If not, it may show a message asking you to install them manually. Just follow the instructions to complete the setup.
Click Finish once setup completes. Decide whether to launch the app immediately, open the read-me, or create a desktop shortcut.
It appears in the Start menu and, if you chose that option, also on the desktop. Once installed, the EXE file is no longer needed. You can safely delete it.
What's Your Reaction?
 Like
0
Like
0
 Dislike
0
Dislike
0
 Love
0
Love
0
 Funny
0
Funny
0
 Angry
0
Angry
0
 Sad
0
Sad
0
 Wow
0
Wow
0